How to use Remote Desktop Connection
Connecting From Windows XP (Service Pack 3 or higher), Windows Vista, or Windows 7
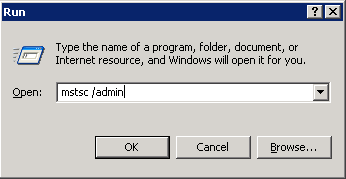
1. Click the Start menu (also click ‘Run…’ for XP) and enter the following into the text box, then press Enter:
mstsc /admin
Here’s what it would look like in Vista or Windows 7:

Here’s what it looks like in XP:

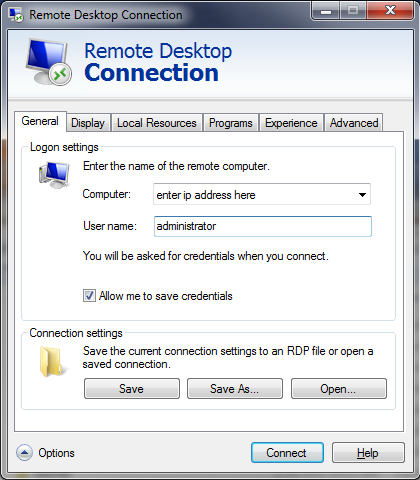
2. You will then be prompted for your IP address and username. (Click the ‘Options’ arrow so you can define the username).
Here is what it looks like:

3. Press connect. You will now be prompted for the password.
4. If successful, you should now be staring at the desktop of your new server, including any applications that we have pre-installed for you.
Hints and Tricks
* If we have pre-installed software such as SAM, Station Playlist, ect, you should immediately see it running. If it is not running, log off immediately using the Start Menu. Double check that you have used the correct command to start remote desktop. If you don’t do it correctly, you will connect to the wrong session and will not see your software running!
* When you are done managing your server, Disconnect by clicking the ‘X’ at the top of the screen. This allows your software to continue running and allow you to connect again from another location. If you Log Off instead of Disconnect, your software may stop running until you log in again.
* If you’re connecting from a very old PC such as Windows 2000 or XP with less than Service Pack 3, you need to use the command ‘mstsc /console’ instead of ‘mstsc /admin’ to connect to the correct session.
* If connecting from Linux or Mac, you need to make sure the ‘Console’ option is enabled so that you connect to the correct session and see your software running.
* If Remote Desktop is too difficult or not working well for you, it’s possible to use LogMeIn.com, TeamViewer, or most other remote control systems. We will be happy to install any of these for you by request.
Share the Love
Back to Server Management


